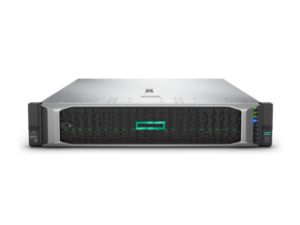
The 10th generation of HP’s DL380 server is offering a greater performance for your vSphere environment.
 Fully equipped with 24 x 128 GB LRDIMM memory modules (two processors, each supports six memory channels with two memory modules per channel), it supports a maximum of 3TB Memory.
The core count was increased, too. With the change from Intel’s Xeon E5 processors to Intel’s new C621 chipsets, you can now run the server with configurations from 4 up to 28 cores per socket depending on the used CPU.
When you implement the new HP DL380 Gen10 Server in our vSphere Environment it makes sense to take a closer look at the BIOS settings for better performance. Here is a summary of the settings I use for a standard vSphere environment.
If you feel that there is something wrong, room for improvement or not mentioned, please let me know.
Workload Profiles:
HPE simplifies BIOS configuration by offering pre-configured workload profiles. For virtualization workload, I use the profile “Virtualization – Max Performance“. When choosing this workload profile, the following options are set automatically:
SR-IOV -> enabled
VT-D -> enabled
VT-x -> enabled
Power Regulator -> Static High Performance
Minimum Processor Idle Power Core C-state -> No C-states
Minimum Processor Idle Power Package C-state -> No C-states
Energy Performance BIAS -> Max Performance
Collaborative Power Control -> Disabled
Intel DMI Link Frequency -> Auto
Intel Turbo Boost Technology -> Enabled
NUMA Group Size Optimization -> Clustered
UPI Link Power Management -> Disabled
Sub-NUMA Clustering -> Enabled
Energy-Efficient Turbo -> Disabled
Uncore Frequency Shifting -> Max
Channel Interleaving -> Enabled
Other BIOS options you should take care off:
No matter which workload profile you choose, you should review all BIOS settings carefully. Here is a list of some special settings you may need to configure:
—> System Options -> USB Options
Configuring these options is only necessary if you install ESXi on the internal SD card or a USB drive key:
- USB Boot Support -> Enabled
- Removeable Flash Media Boot Sequence -> Internal SD Card First / Internal Drive Keys First (depending if you install ESXi on an SD Card or a USB drive key
—> Server Availability
- ASR Status -> Disabled
Note: ASR monitors an agent running in the Service Console. When this agent is not responding within the configured ASR timeout, the host is rebooted. However, if the agent fails or the Service Console becomes sluggish (even though the VM’s are perfectly fine), ASR will detect this as a system hang and will reboot the server. Furthermore, in case of a PSOD, ASR will reboot the server as well. This reboot might cause a loss of some logfiles.
If you do not want to disable ASR you can set the ASR Timeout using the -> ASR Timeout Setting. Choose between the following wait times:
5 Minutes
10 Minutes
15 Minutes
20 Minutes
30 Minutes
—> Processor Options:
- Intel (R) Hyperthreading Options -> Enabled
- Processor Core Disable -> 0 (0 = all cores enabled)
- Processor x2APIC Support -> Enabled
—> Memory Options:
- Advanced Memory Protection -> Advanced ECC Support (this setting provides the largest memory capacity. Alternatively you can choose “HPE Fast Fault Tolerant (ADDDC))
- Node Interleaving -> disable (if you enable this setting you would switch to SUMA instead of NUMA!)
—> Virtualization Options:
- Virtualization Technology -> Enabled
- Intel (R) VT-d -> Enabled
- SR-IOV -> Enabled
—> Boot Options:
- Boot Mode -> UEFI (default)
—> Boot Time Optimizations:
- Extended Memory Test -> Enabled
—> Power Management:
- HP Power Profile -> Maximum Performance
—> Performance Options:
- Intel (R) Turbo Boost Technology -> Enabled
- ACPI SLIT Preferences -> Enabled
—> Advanced Options
- Fan and Thermal Options – Thermal Configuration -> Optimal Cooling or Maximum Cooling
Note: Optimal Cooling is the default and should be sufficient. But in some best practices, you will read the recommendation to use “Maximum Cooling”.
