This short “How-to” should provide you a step-by-step explanation to provide a quick-and-dirty configured S3 Object Storage for tests in your homelab.
I would not recommend you to use this setup in production 🙂 But it is perfect for some quick tests.
The guide will help you to configure Minio server with TLS certificates on Windows.
What is Minio?
Minio is an open source object storage server compatible with Amazon S3 APIs.
So let’s start:
- download Minio from github (scroll down to binary download for Windows)
- place minio.exe on the intended server – eg. at c:\minio
- create a directory for the data – eg. S:\cloud
- to start your Minio server just run the following command:
C:\minio.exe server S:\cloud (“server” is case sensitive)
If you now take a closer look at the output you will notice three important lines:
Its hard to read the lines in blue, so here is a copy:
Endpoint: http://192.168.209.100:9000 http://127.0.0.1:9000
AccessKey: 12345678
SecretKey: 12345678
You can open a webbrowser to access your Minios Server using one of the provided links (eg. http://127.0.0.1:9000). The login-page will prompt you to input the AccessKey and the SecretKey.
By the way, you can change these keys very easy. Search for the config.json file in %directory for the data%\.minio.sys\config and open it with an editor.
In most cases you need to configure your Minios Server with TLS certificates
The next steps will help you to generate self-signed certificates using GnuTLS for Windows:
- open the GnuTLS website
- search for the “GnuTLS for Windows” download link on gitlab (Latest w64 version on gitlab)
- extract the downloaded .zip file at your Minios Windows Server
- open a cmd box and change to …\win64-build\bin
- add the path to the GnuTLS binaries to the system path using the following command:
setx path “%path%;path_to_the_bin_folder\win64-build\bin”
- now generate a private key using the following command (take care if you copy the following command there must me double minus before generate and before outfile):
certtool.exe –generate-privkey –outfile private.key
For the next step open an editor and copy/paste the following content into it. Then customize the fields if you want (for a quick and dirty local installation you can leave them as is). Save the file as cert.cnf
Note Feb/2020: I noticed that the cert.cnf example below may not work with a newer version. So if the cert.cnf example one is not working for you, try the second one below:
####### cert.cnf ######
# X.509 Certificate options
#
# DN options
# The organization of the subject.
organization = “Test Company”
# The organizational unit of the subject.
#unit = “Homelab Departement”
# The state of the certificate owner.
state = “Test”
# The country of the subject. Two letter code.
country = “EX”
# The common name of the certificate owner.
cn = “Hugo”
# In how many days, counting from today, this certificate will expire.
expiration_days = 365
# X.509 v3 extensions
# DNS name(s) of the server
dns_name = “localhost”
# (Optional) Server IP address
ip_address = “127.0.0.1”
# Whether this certificate will be used for a TLS server
tls_www_server
# Whether this certificate will be used to encrypt data (needed
# in TLS RSA cipher suites). Note that it is preferred to use different
# keys for encryption and signing.
encryption_key
##########
## cert.cnf EXAMPLE 2 #######
organization = “Homelab”
state = “NY”
country = “US”
cn = “John Smith”
expiration_days = 365
dns_name = “localhost”
ip_address = “192.168.209.10”
tls_www_server
###################
- to generate the public certificate now enter the following command:
certtool.exe –generate-self-signed –load-privkey private.key –template cert.cnf –outfile public.crt
Congrats, you generated the necessary certs quick and dirty for your testlab 🙂
- Copy the generated certificates to the Minio config path. In your windows installation this should be: C:\Users\<your user name>\.minio\certs
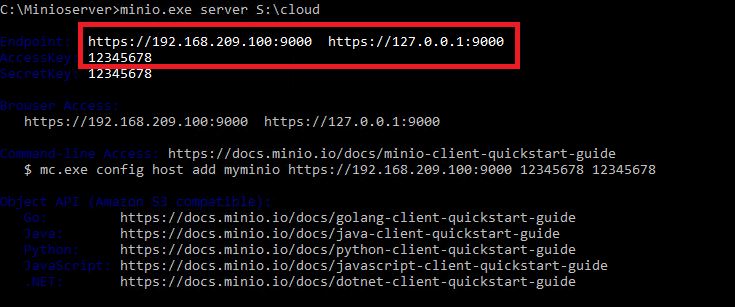
If you start your Minio Server again with the command from above…
C:\minio.exe server S:\cloud
.. you can see that its now possible to access your Minios Server via https://
To create a bucket you can now login to your Minios server. Using the big red cross downright you can add a bucket.
Note:
As already mentioned, this is a really quick and dirty configuration for homelab usecases only!


