
Updating the Active Directory schema is an irreversible operation – therefore I need a test environment which is completely isolated from production to test all affected applications/virtual machines.
One requirement is to keep the IP settings of the test candidates, a second one that it should be very easy to clone virtual machines from production to test.
There are several ways/designs to fulfill these requirements – I decided to use the following one, as it was very easy to put into operation without investing a lot of time and hardware.
Disadvantage is, that the only possiblity to reach the test VMs is via console of the webclient/vSphere Client:
The entire test environment is running on one single VMware ESXi host, equipped with sufficient RAM and local disks. The ESXi host has access to a dedicated LUN on the shared storage to exchange virtual machines easily.
To ensure that the virtual machines of the test environment have no network access to production, I configured the vSwitch for the VMs without a physical adapter.
The second vSwitch has a connection to the network (management traffic and vMotion is enabled). So you can access the virtual machines via console of the webclient/vSphere Client and clone them from production to test.
As the vSwitch for the VMs has no connection to a physical network switch, you need a solution for network traffic routing. I use a windows virtual machine (Server 2012 R2) with activated LAN Routing.
Our requirements:
- test is isolated from production
- possiblity to clone productive VMs into test environment
- keep computernames
- keep original network settings (IP, subnet,…)
- setup should not take a lot of time
- use existing hardware
ESXi Host:
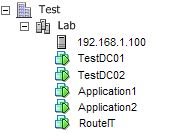
Install your ESXi host as usual and add it to your vCenter Server (maybe into an own cluster):
Network configuration of the ESXi host:
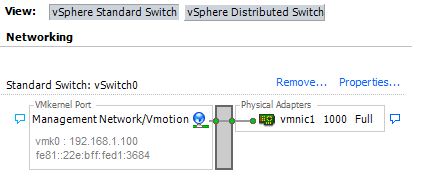
vSwitch 0 (for management traffic and vMotion):
This vSwitch uses a physical NIC to access the company’s network.
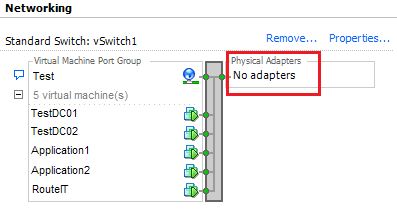
vSwitch 1 (for virtual machines):
No physical adapters are configured for this vSwitch. This ensures that no traffic from the test environment find its way into production.
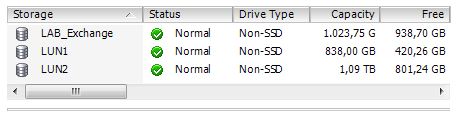
Datastores/Storage:
Two datastores are configured with local discs to host the virtual machines. Additionally the host has access to a LUN on the company’s shared storage system to exchange virtual machines between these two worlds.
Network traffic routing:
As the virtual machines have no connect to a physical router and as the vSwitch has no routing function, we need a possiblity to route the network traffic between the different VLANs of the virtual machines.
If you want, you can use a virtual router (e.g. pfSense) for this. I decided to use a Server 2012 R2 VM with active LAN Routing to take this role.
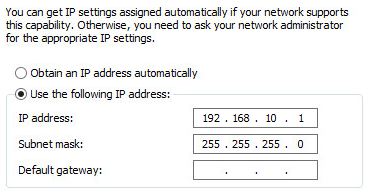
If you want to use a windows server as virtual router, just add one network adapter for each VLAN to the VM.
Configure each network adapter with the gateway address used by the virtual machines (eg. 192.168.10.1 for VLAN 1, 192.168.20.1 for VLAN2,…)
When you have configured a dedicated NIC for each needed VLAN, open a MMC and add the following Snap-in: Routing and Remote Access.
To configure LAN Routing follow these steps:
- right-click Routing and Remote Access, select “Add Server…” and add “This computer”
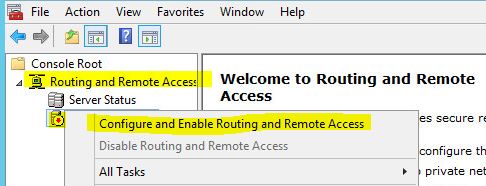
- right-click your computer and select “Configure and Enable Routing and Remote Access”
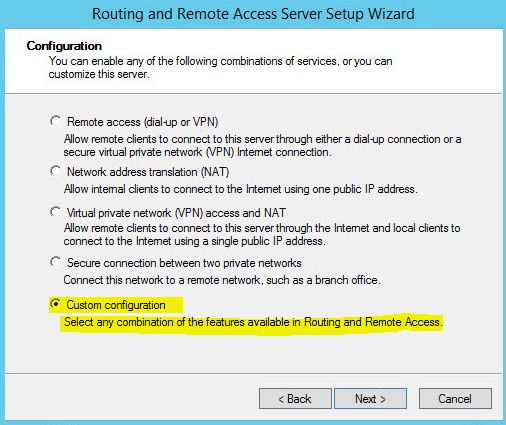
- click next to start the setup wizzard
- select “Custom configuration”
- select “LAN routing”

- click “Finish”
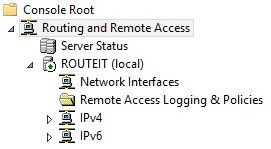
If necessary say yes to start the “Routing and remote access service”. When everything is fine you should see a green symbol next to the servername:
Clone your production VMs into the test environment:
If everything is correctly configured you should now be able to clone your productive VMs into the the test environment:
Select the VM, click “clone”, define a name and select the test host as target.
You can ignore the compatibility warning, that the network adapter uses a network which is not accessible. You can adapt this after cloning is completed.
After selecting a destination storage, the wizzard asks you if you want to customize the guest operating system. Select “Do not customize” when you need an identical virtual machine for your tests!
With “Finish” you can start the process.
When cloning is completed take a look at the network adapter settings (eg. Network label,…).
If everything is configured as wanted you can start the VM and test network routing.