
Veeam Backup for Microsoft Office 365 is a powerful solution that allows you to backup and restore MS Exchange, MS Sharepoint, MS OneDrive for Business and MS Teams data.
You can download the product (and also a trial key) here:
The installation and configuration is straight forward. The main challenge I see very often is when it comes to adding organizations with Modern App-only Authentication. This is a procedure many admins are not used to – even though it is not really difficult.
This how-to guide will show you the necessary steps. Additional information is available in the user guide:
Veeam Backup for Microsoft Office 365 User Guide
Prepare an O365 Service User Account
Depending on the scope you want to backup/restore (Exchange, Sharepoint, OneDrive, Teams) you should configure an O365 service user account with a minimum set of permissions. This how-to will show the configuration of all topics.
- Log-in to your O365 portal and add a new user:

- After creating the service user change to the Exchange Admin center

- select “Roles” – “Admin roles” and “add role group”
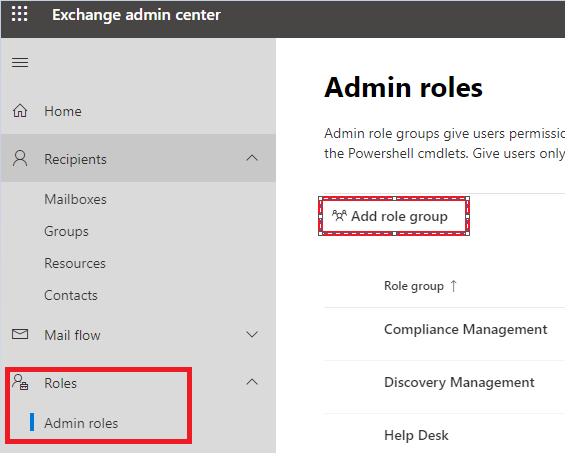
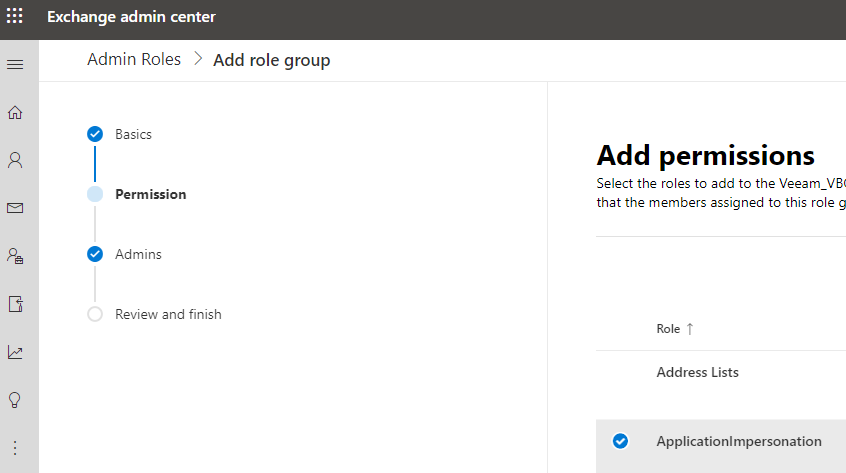
- Add the following permissions for Exchange Online: (link to helpcenter)
ApplicationImpersonation, Mailbox Search or Mail Recipients, Reviewer or Owner (if available), Role Management, Organization Configuration, View-Only Configuration, View-only Recipients
- in the admin step assign the created service account:

- review the role and the permission settings and finish the wizard
- change back to the settings of the service account and add the roles for Sharepoint and OneDrive:
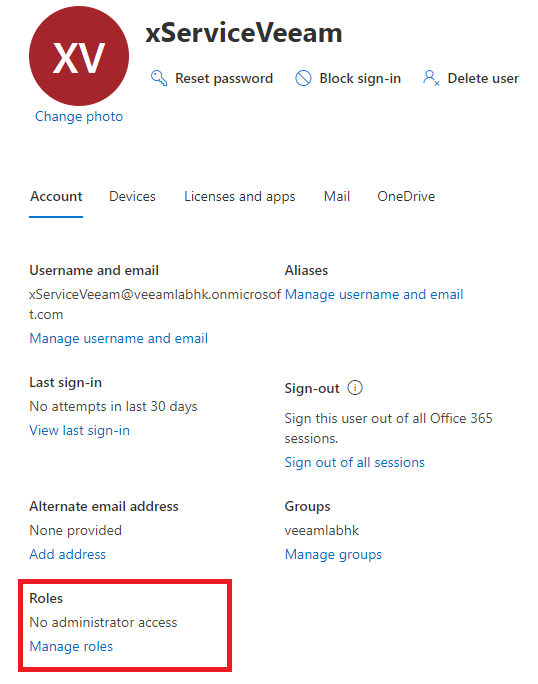
- Add the following roles to the service account:
“Sharepoint Admin” + “Team Service Administrator”
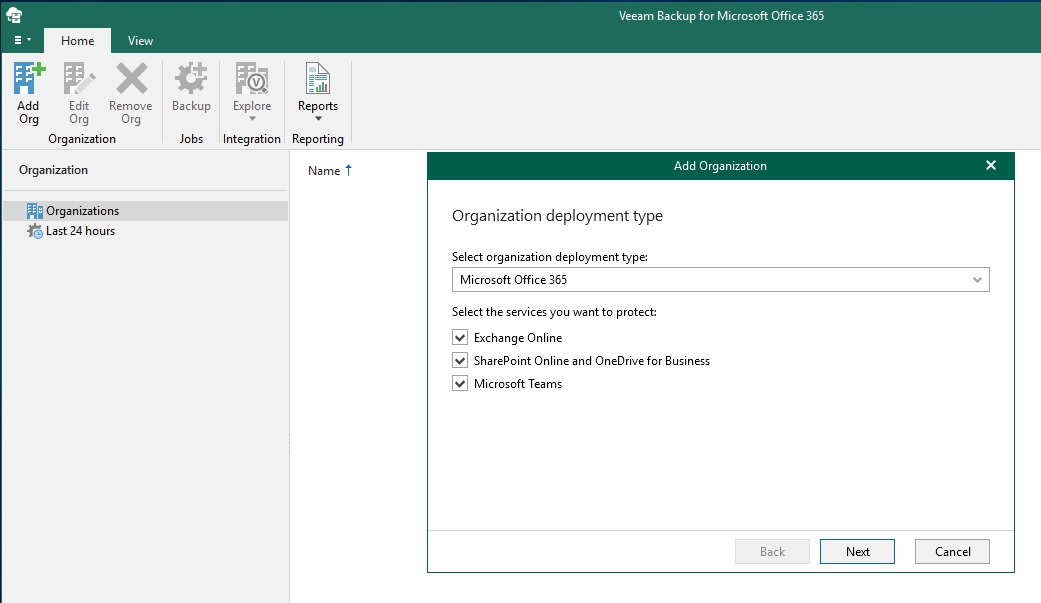
- save all settings and change to the Veeam Backup for O365 installation. Select “Organization” – “Add Organization” and tick all services you want to protect:
- select “Modern authentication”:

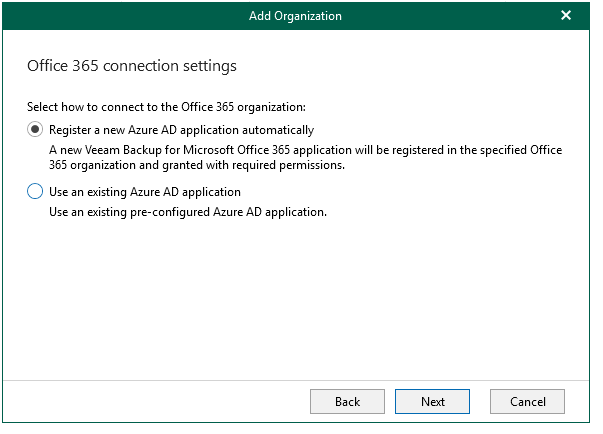
- select “Register a new Azure AD application automatically:
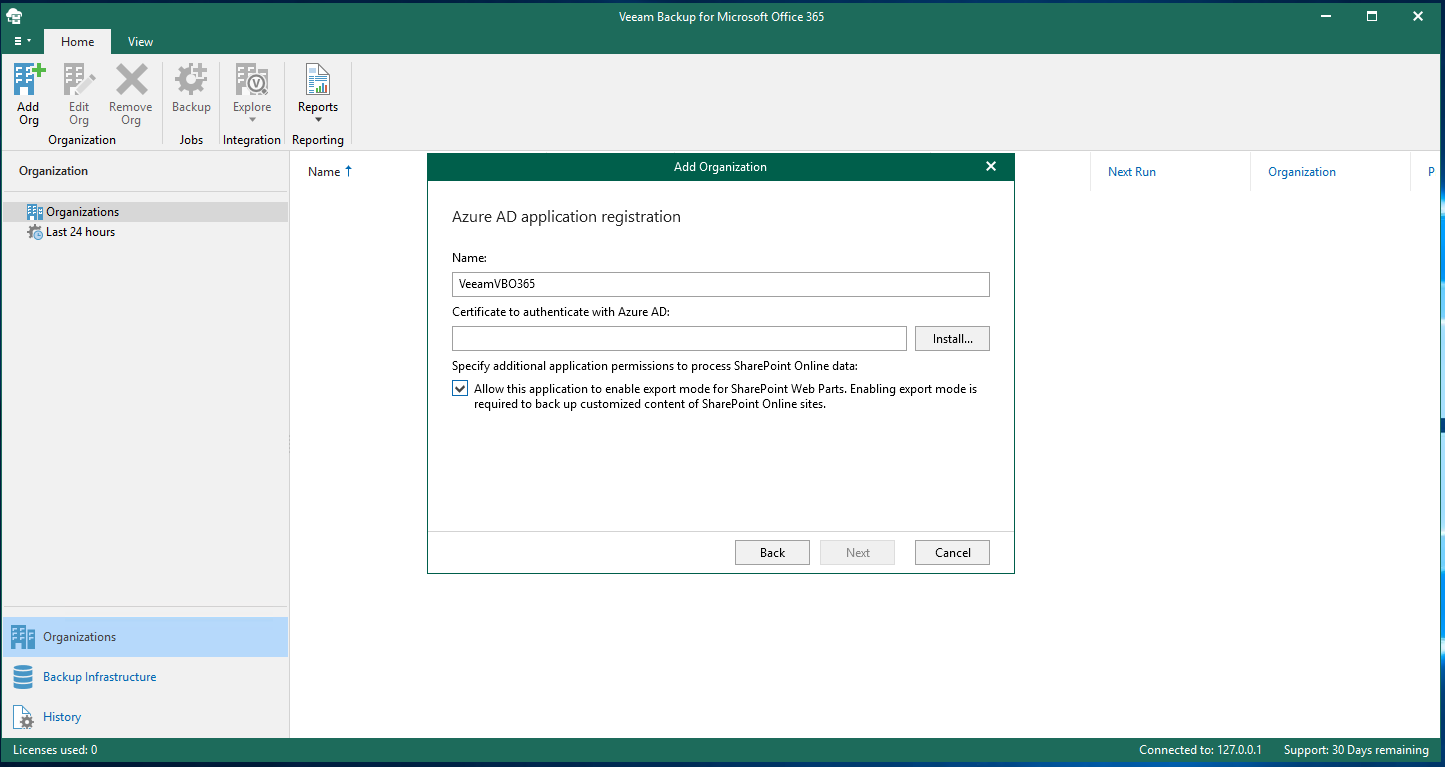
- Enable the tick box “Allow this application to enable export mode…” and click the “Install” button next to “Certificate to authenticate with Azure AD:
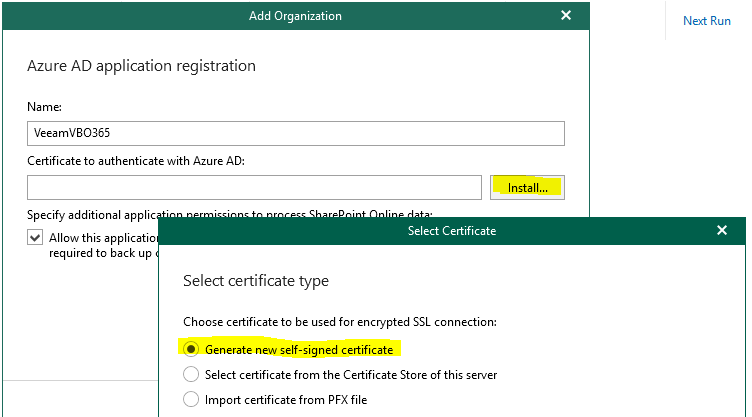
- select “generate a new self-signed certificate” and click “next”:
- use the suggested friendly name or change it when necessary
- open the displayed link to https://microsoft.com/devicelogin and use the displayed code for the next steps:

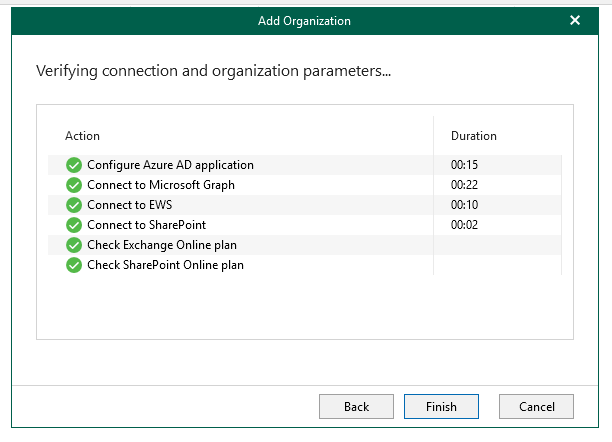
- follow the steps in the wizard. When finished you can switch back to the Veeam Backup for O365 console to finaly add the organization
When all necessary permissions were provided to the service account you can finish the “add organization” wizard and create the first backup jobs!