
There are many ways to upgrade your ESXi Hosts from ESXi 5.0 to 5.1 – eg. with a script, via commandline (esxcli) or using Auto Deploy. But did you know that you can use VMware Update Manager, too?
This How-to will help you to perform the necessary steps concerning the upgrade of the ESXi hosts. But please note that this article does not include the necessary steps for upgrading your vCenter Server, the installation of SSO,…
If you need information about this topic please read the following documents about the update:
Steps to upgrade the ESXi Hosts using Update Manager:
- Download the binaries
- Import the ESXi Image into Update Manager
- Attach Baseline
- Scan hosts and perform the upgrade
Step 1: Download the binaries
Download the binaries from VMware.com or from your hardware vendor if there is an customized VMware ESXi Image available.
HP for example has an own download site for their HP ProLiant Servers: Customized VMware ESXi Images for HP ProLiant Servers
Step 2: Import ESXi Image into Update Manager
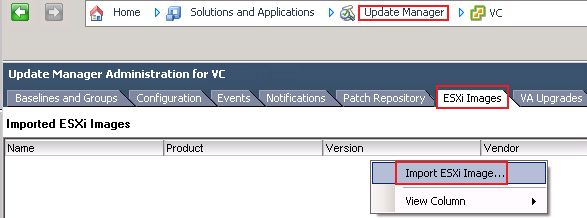
Login to your vCenter and navigate to the Update Manager: “Home” – “Solutions and Applications” – “Update Manager”
Open the Tab “ESXi Images” and select “Import ESXi Image”:
- select the path to the ESXi image you have downloaded before and click “next”
- the wizzard will start to upload the image – this can take some seconds
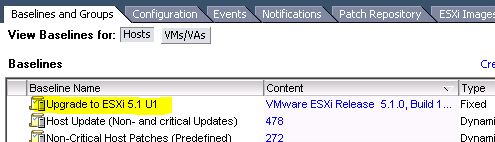
- in the last step you can create a baseline using the new ESXi image, please change the name of the baseline and click “Finish”
You can now find the new baseline in the tab “Baselines and Groups”:
Step 3: Attach Baseline
Now you have to attach the baseline to your cluster. Open “Home and Clusters” and select the Cluster with the ESXi Hosts you want to upgrade.
Navigate to the “Update Manager” tab and select “Attach”:

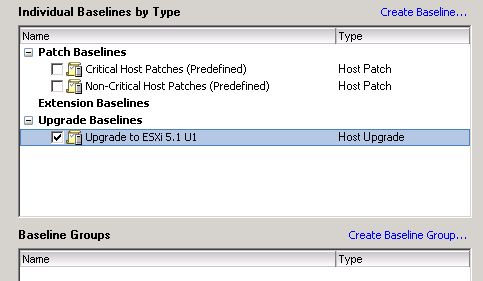
In the “Attach Baseline or Group” Wizzard select the baseline created in the step before:
Step 4: Scan hosts and perform the upgrade
Now you can scan your ESXi hosts against the new defined baseline. Select an ESXi Host and click “Scan for Updates”.
Do not forget to uncheck “Patches and Extensions” in the next window and select the “Upgrades” box:

The scan takes some minutes. When it is finished you can see if the host is compliant or non-compliant against the baseline.
To perform the upgrade, right-click the host and select “Remediate”.
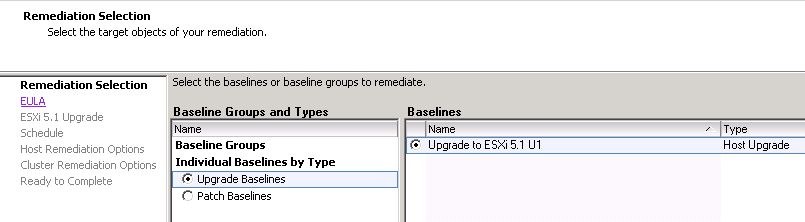
In the Remediation-Wizzard select the defined Upgrade-Baseline:
After clicking “Next” accept the EULA
The next window enables you to remove installed third-party software that is incompatible with the update. If necessary select the check box:

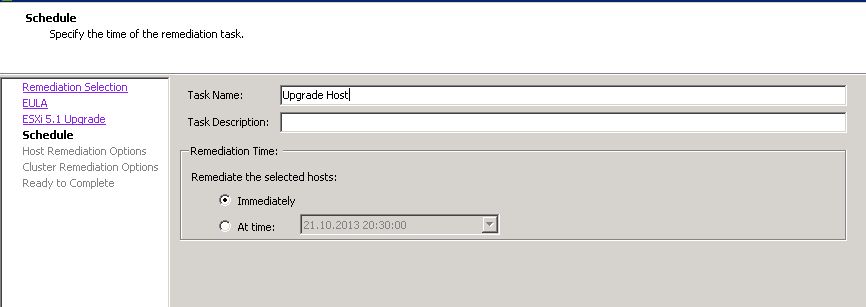
Now you can specify a task name and schedule the remediation if necessary:
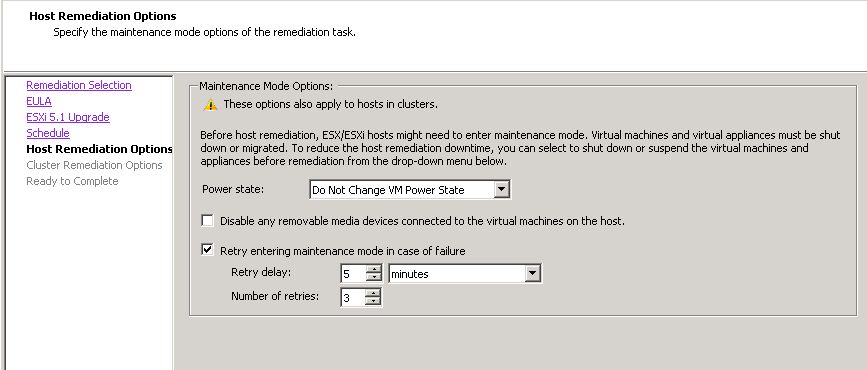
After clicking “Next” you can define some maintenance mode options:
An last but not least you can define some cluster remediation options:

Check the “Ready to complete” summary and click “Finish” to start the upgrade process… and cross your fingers that the task complete successfully!